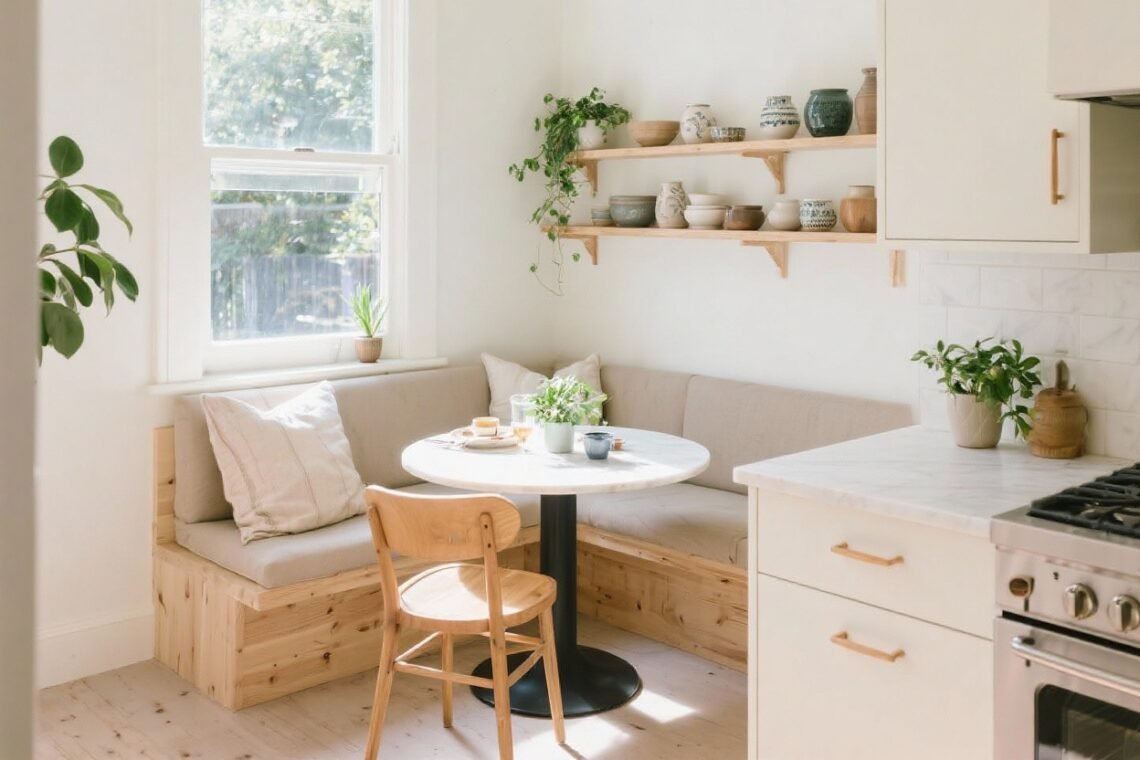
You want a cozy place to eat that doesn’t hijack your whole kitchen? Same. The good news: you don’t need a massive space to pull off a functional, cute-as-heck dining zone. With a few smart moves, your tiny kitchen can multitask like a champ—cook, eat, hang, repeat.
Let’s squeeze every inch of potential out of your kitchen and make it feel intentional, not cramped. Ready?
1. Pick Furniture That Earns Its Keep
In a small kitchen, every piece has to pull double duty. Think compact tables, flexible seating, and storage that moonlights as dining furniture. No slackers allowed.
Smart Table Choices
- Drop-leaf or gateleg tables: Fold down when it’s just you, open up when friends pop over. Classic space magic.
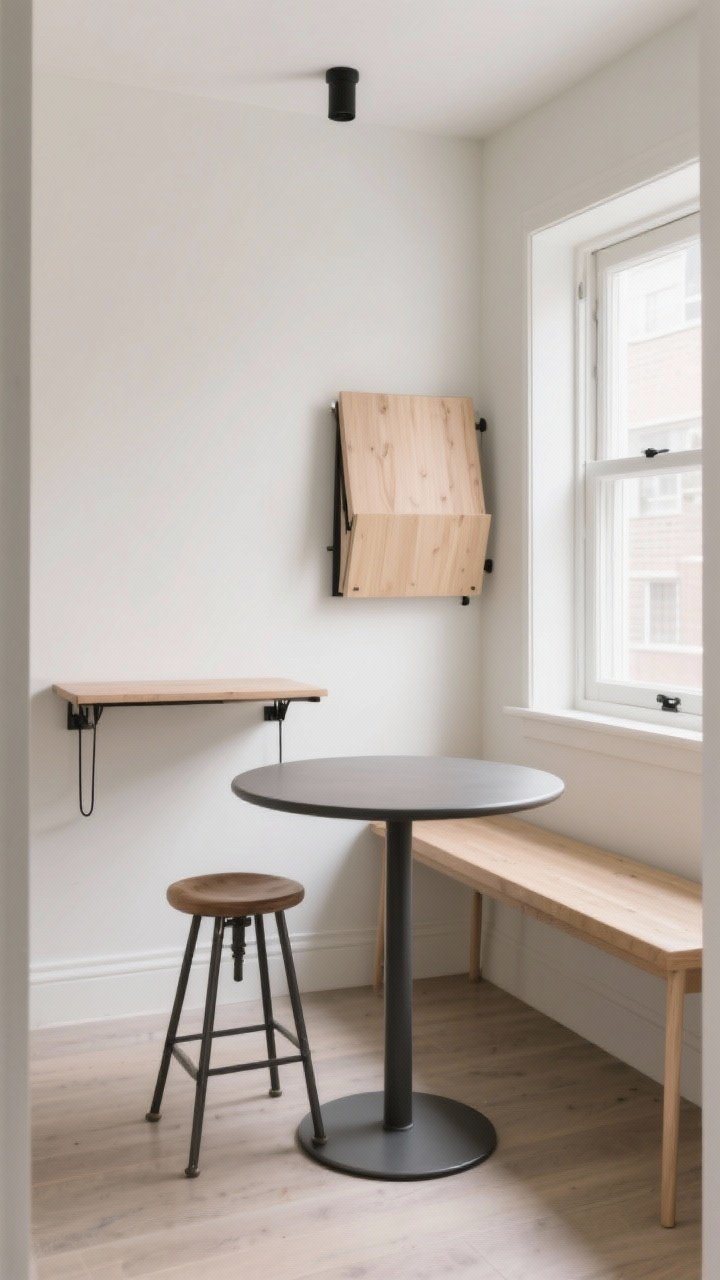
- Wall-mounted tables: A flip-down ledge gives you an instant eating spot without hogging floor space.
- Round bistro tables: Curves take up less visual space and keep traffic flow smooth.
Multi-Tasking Seating
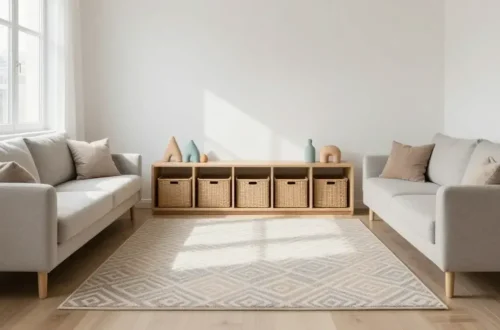
- Storage benches: Tuck placemats, appliances, or pet gear inside. Bench on top, pantry below—win/win.
- Stackable or folding chairs: Pull them out when needed; hide them when you don’t.
- Backless stools: Slide under a table or counter to keep the walkway clear.
FYI: Aim for pieces with slender legs and light profiles so the area doesn’t feel blocked or heavy.
2. Build In: Banquettes, Nooks, And Sneaky Corners

If your kitchen is tiny, the corners are your secret weapon. Built-in seating tucks into dead zones and makes a dining spot feel intentional, not wedged in.
Banquette Basics
- L-shaped corner banquette: Fits more people in less space and looks custom, even if it’s just cleverly arranged storage benches.
- Slim cushions: Keep them lean so you don’t lose precious seat depth. Choose wipeable fabrics for easy cleanup.
- Under-seat drawers: Store table linens, serveware, or your “I swear I’ll use this” gadgets.
Tiny Nook Hacks
- Window ledge upgrade: Add a narrow table and two chairs for an instant café vibe.
- End-of-counter perch: Extend your countertop by 10–12 inches to create a breakfast bar.
Pro tip: Keep the table pedestal-style if possible so legs aren’t fighting for territory under the bench.
3. Zone It Like A Designer
You don’t need walls to define a dining area—you need visual cues. Create a “zone” so your kitchen reads as two spaces: cook here, eat there.
Simple Zoning Tricks
- Rug it up: A flatweave or indoor-outdoor rug anchors the dining side and can handle spills.
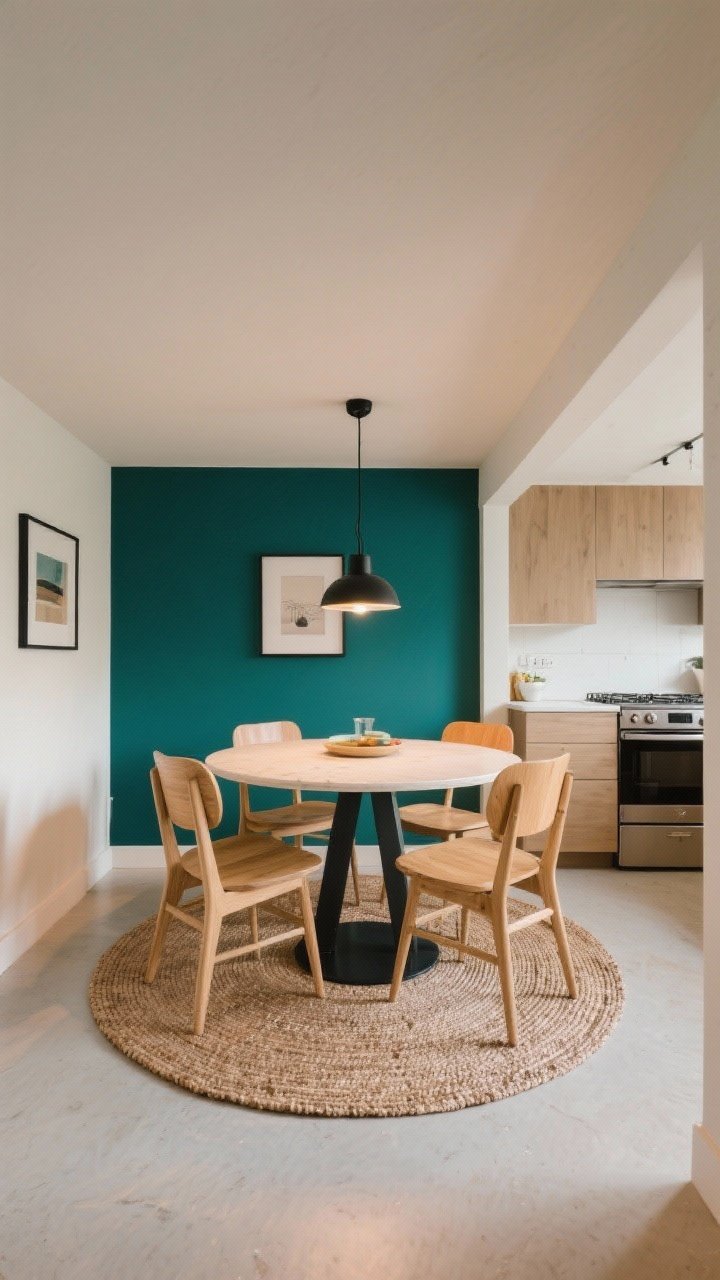
- Lighting change: A pendant or small chandelier above the table instantly sets a mood. Keep it centered—chef’s kiss.
- Wall moment: Add art, a mirror, or a bold paint color on the dining wall to separate it from the work zone.
Keep paths clear: you want at least 24–30 inches of clearance around chairs so people can slide in without a furniture wrestling match.
4. Scale, Shape, And Layout: The Small-Space Math

Let’s talk numbers so your dining area feels right-sized and comfy. Tiny spaces thrive on smart proportions.
Measurements That Matter
- Table size: For two people, 24–30 inches wide is plenty. For four, try 36–40 inches round or a 30×48-inch rectangle.
- Chair spacing: Allow 22–24 inches per person for comfort.
- Height harmony: Standard table height is 28–30 inches; counter height is 34–36 inches. Match your chairs/stools accordingly.
Pick The Right Shape
- Round tables: Best for tight corners and avoiding traffic snags.
- Oval: Great for narrow rooms—soft edges, more seating.
- Rectangular/narrow: Works against a wall or banquette; looks sleek, not bulky.
IMO, a small round table with a pedestal base is the MVP for most kitchen dining tweaks.
5. Storage That Moonlights As Style
Clutter kills cozy. The trick is sneaking storage into pieces that look polished and purposeful.
Hide It In Plain Sight
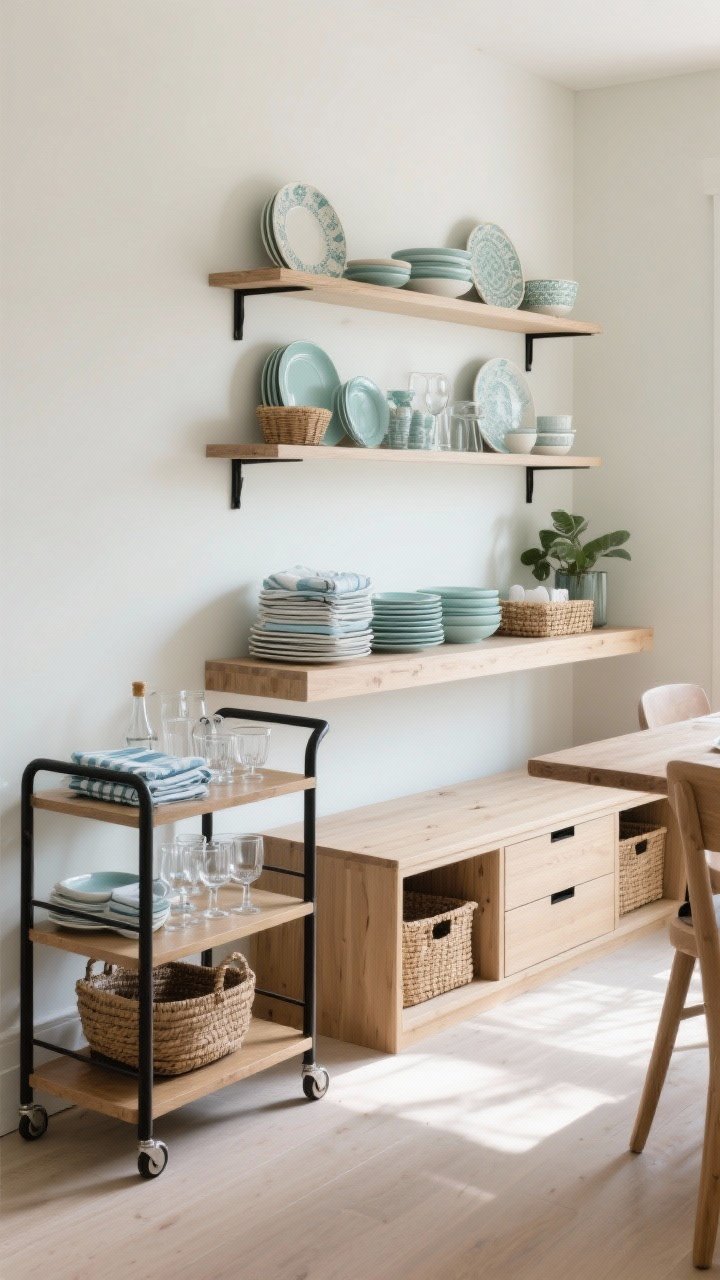
- Sideboard substitute: A slim console or bar cart holds napkins, plates, and glassware. Roll it where you need it.
- Floating shelves: Stack pretty dishes up top and stash daily items in baskets below.
- Bench storage: Deep drawers or lift-up lids keep the dining area looking zen.
Vertical Wins
- Peg rails: Hang mugs, linens, even a small planter. Charming and practical.
- Magnetic strips: For knives near the prep zone so drawers aren’t overflowing.
Stick to a cohesive color palette so storage blends with the dining setup—think light woods, matte black hardware, and one accent color to tie it together.
6. Light, Mirrors, And Materials That Fake More Space
Small kitchens thrive on optics. You’re not just decorating—you’re bending reality a little.
Lighting Layers
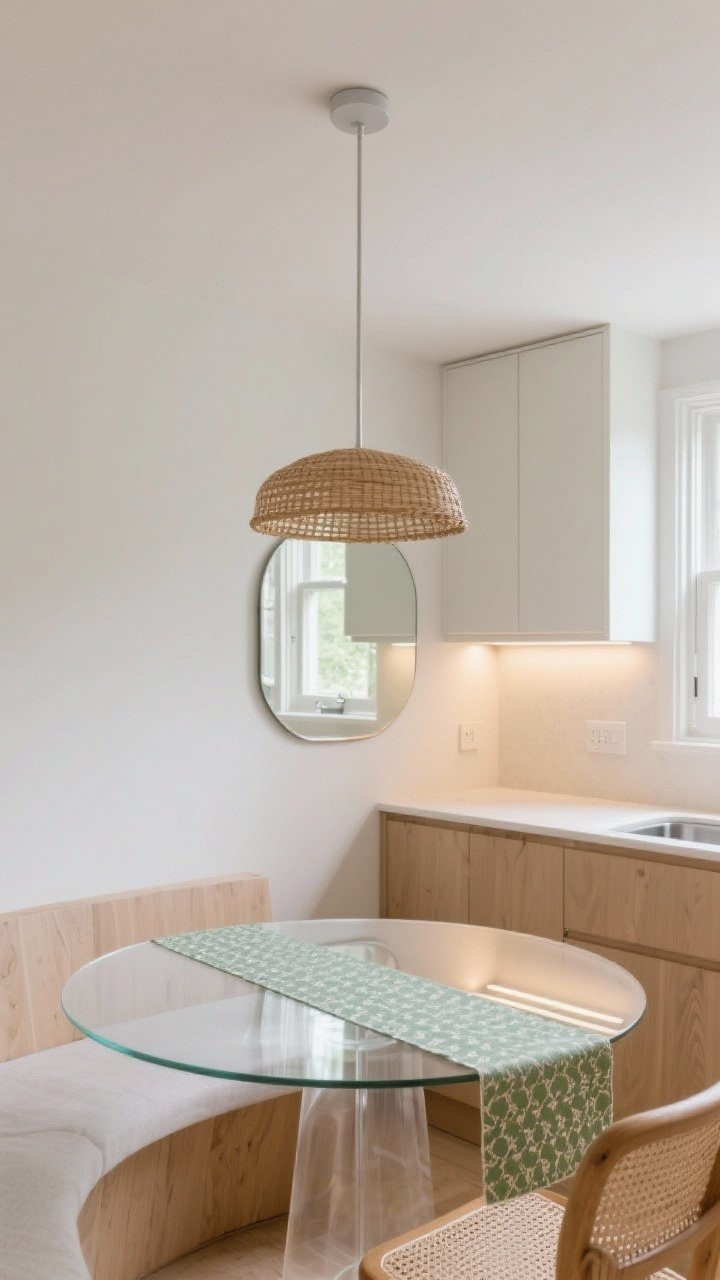
- Pendant over the table: Creates a destination. Choose a shade that doesn’t block sightlines—glass, rattan, or slim metal.
- Under-cabinet lighting: Keeps prep bright so the pendant can be softer and moodier.
- Dimmer switch: Dinner lighting shouldn’t feel like a dentist’s office. Enough said.
Materials That Open Things Up
- Glass or acrylic tables: Visually disappear, making the space feel bigger.
- Mirrors: A mirror opposite a window doubles the light and the view. Classic trick because it works.
- Light finishes: Pale woods, soft whites, sage, or misty blues make compact spaces breathe.
FYI: Keep patterns small-scale and use them sparingly—pillows, a runner, or one standout chair—to avoid visual clutter.
7. Make It Feel Like A Real Dining Room
Just because it’s in the kitchen doesn’t mean it has to feel like a pit stop. Dress it up so meals feel special, even on a Tuesday.
Finish The Look
- Textiles: A washable runner, linen napkins, and a small cushion on the bench add instant warmth.
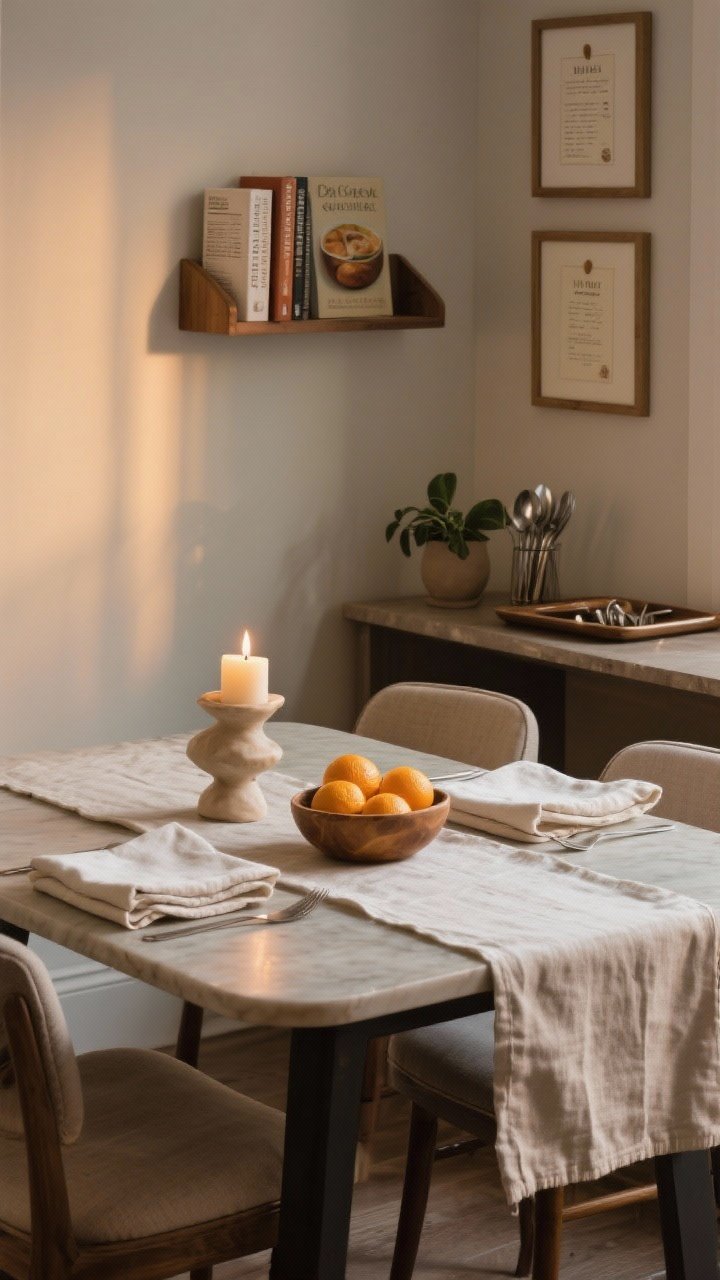
- Centerpiece, scaled right: A low vase, a bowl of citrus, or a sculptural candle. Keep it under 8 inches tall so you can see your people.
- Personal touches: A small gallery wall, framed recipe cards, or a mini shelf with cookbooks and a plant.
Entertaining Mode
- Tray system: Use a tray to shuttle utensils and condiments from cabinets to table in one go.
- Stash extras: Keep two fold-up chairs in a nearby closet so you’re always “guest ready.”
- Sound + scent: A tiny Bluetooth speaker and a subtle candle make the corner feel like a destination.
And yes, even a tiny table deserves real plates. The ritual makes the space feel bigger because you actually want to sit there.
Final thought: Your small kitchen can absolutely handle a dining area. Focus on furniture that flexes, smart zoning, and a few mood-boosting details. Keep surfaces clear, light it right, and don’t be afraid of a little personality. You’re not just squeezing in a table—you’re carving out a daily ritual you’ll actually use and love.