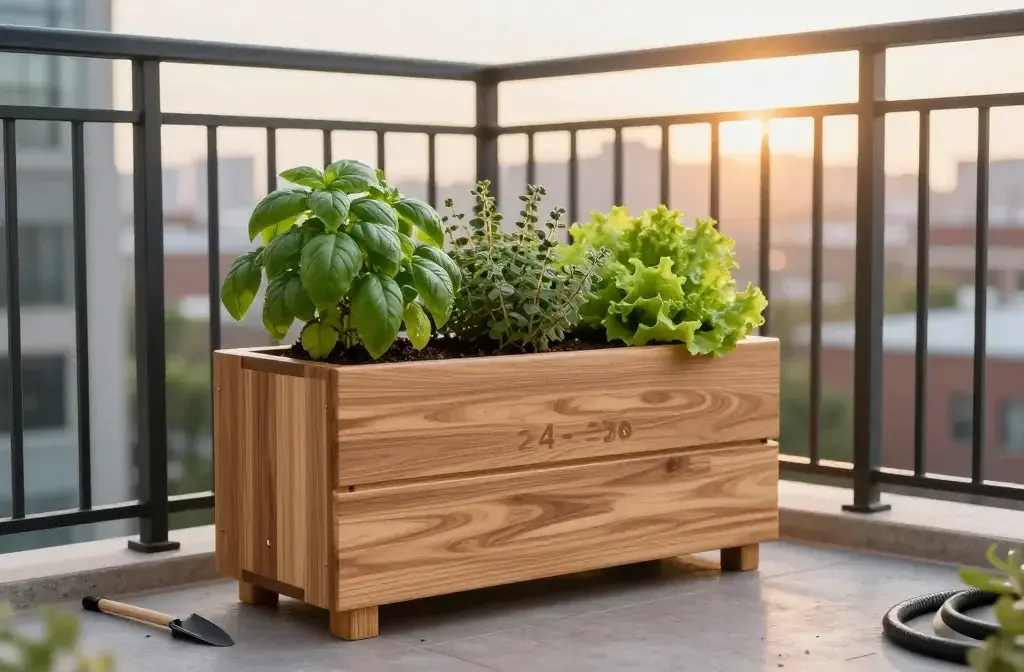
Your balcony wants a glow-up, and you know it. You don’t need a backyard to grow herbs, flowers, or lettuce that actually tastes like lettuce. You just need a sleek little planter box, a sunny spot, and about an afternoon’s worth of effort. Let’s build a modern, compact planter that fits on a balcony or fire escape without annoying your neighbors or your landlord.
Plan the Size and Style (Before You Touch a Saw)
You want a planter that looks intentional, not like a crate escaped from a warehouse. So first, measure your space. Twice. Then plan your box to sit snugly along a railing or wall without blocking doors or windows.
Quick design goals:
- Keep it shallow: 8–10 inches deep works for herbs and greens. Go 12 inches for tomatoes or peppers.
- Go long, not wide: A 24–36 inch length fits most balconies and fire escapes without sticking out.
- Use clean lines: Straight edges, no fussy trim, hidden screws if possible. Modern = simple.
Materials That Won’t Rot in Six Months
You’ll win or lose this build on materials. Outdoor wood fights water, sun, and whatever blows off the street.
- Cedar or redwood: Lightweight, rot-resistant, smells like a spa. Best value.
- Thermally modified wood: Fancy and stable if you can find it.
- Exterior screws: Stainless or coated deck screws. No rust streaks, please.
- Geotextile fabric or landscape fabric: For a breathable liner.
- Optional: Waterproofing sealer, aluminum angle for a clean rim, or hairpin legs for drama.
Safety and Weight: Don’t Turn Your Balcony Into a Gym
Let’s talk load limits before we get carried away with soil and ambition. Wet soil weighs a lot. Like, “why does my balcony creak now?” a lot.
Rule of thumb:
- 1 cubic foot of moist soil weighs about 75–90 pounds.
- A 36 x 10 x 10 inch planter holds roughly 2 cubic feet = 150–180 pounds plus wood + plants.
If that number scares you, good. Scale down the length, reduce depth, or choose lightweight potting mix (not garden soil). And never, ever hang a loaded planter on a sketchy railing. IMO, floor-supported beats railing-mounted for almost everyone.
Drainage Without the Mess
You need holes. Plural. Drill 6–10 holes (3/8–1/2 inch) across the bottom so water escapes. Add a breathable liner so soil doesn’t escape with it.
Pro tip: Elevate the planter on small feet or rubber pads so water can drain and your deck boards don’t suffer.
Cut List and Tools: Minimalist Build, Minimal Drama
You don’t need a full woodshop. You can do this with a handsaw and a drill, but a miter saw speeds things up.
Tools:
- Miter saw or handsaw
- Drill/driver + 1/8 inch bit + 3/8–1/2 inch bit
- Measuring tape, square, pencil
- Staple gun (for liner) or exterior-grade heavy-duty tape
- Sandpaper (120–150 grit)
Suggested dimensions (customize to fit):
- Length: 30 inches
- Width: 10 inches
- Height: 10 inches
Cut list (for 1×6 cedar boards + 1×2 cleats):
- Front/Back: 4 pieces of 1×6 at 30 inches (two stacked high for 10.5 inches overall)
- Sides: 4 pieces of 1×6 at 8.5 inches
- Bottom: 3–4 pieces of 1×6 ripped or spaced to total 8.5 inches wide
- Cleats: 1×2 strips, four pieces at 7 inches (to support the bottom)
- Optional top trim: 1×2 mitered frame at 30 x 10 inches outside
Assembly: The Satisfyingly Simple Part

Let’s build a sturdy box that doesn’t wobble like a folding chair at a barbecue.
- Build two panels: For the long sides, stack two 1×6 boards and join them with vertical 1×2 cleats inside at each end. Pre-drill and screw from the inside so the exterior stays clean.
- Add the short sides: Attach two 1×6 boards per end to create your rectangle. Check for square by measuring diagonals. If they match, you’re golden.
- Install bottom supports: Screw 1×2 cleats along the lower inside edge on all four sides to create a ledge for the bottom boards.
- Drop in the bottom: Lay the 1×6 boards across the cleats with 1/8–1/4 inch gaps for drainage. Pre-drill and secure.
- Drill drainage holes: Add holes through the bottom boards. Don’t skip this unless you love root rot.
- Sand lightly: Knock down sharp edges. Keep it minimal to maintain that modern, crisp look.
- Seal, if you want: Apply a water-based exterior sealer to prolong life. FYI, avoid glossy yacht vibes unless that’s your thing.
- Add top trim (optional): A 1×2 mitered frame hides edges and makes it look custom.
Lining and Final Touches
Line the inside with geotextile or landscape fabric. Staple along the top, then trim excess so it doesn’t show above the rim.
Why line it?
- Reduces soil contact with wood, so the box lasts longer.
- Keeps fine particles in while still letting water out.
For a modern finish, you can add short metal or cedar feet. Even 1/2 inch of lift makes drainage and cleaning easier.
Soil, Planting, and What Actually Thrives Up There
Use a lightweight potting mix. Not topsoil. Not compost alone. A mix with perlite or pumice keeps roots happy and your back intact.
Great balcony/fire-escape plants:
- Herbs: Basil, thyme, mint (mint goes wild, so give it boundaries), chives, parsley.
- Salad greens: Lettuce, arugula, kale (baby kale is cute and tough).
- Compact veggies: Cherry tomatoes, peppers, bush beans. Pick dwarf or patio varieties.
- Flowers: Marigolds, nasturtiums, dwarf zinnias. Pollinators will send you heart eyes.
Sun, Water, and Reality Checks
Track your sun for a day or two. South and west balconies roast. North-facing? Go heavy on greens and herbs.
Watering rhythm:
- Stick your finger in the soil. If the top inch feels dry, water thoroughly until it drains.
- Morning watering beats evening (less mildew, fewer mosquitos crash the party).
- A simple drip line or self-watering insert saves vacations and forgetful brains. IMO, it’s worth it.
Mounting and Placement: Keep It Secure and Legal
If you plan to place the planter on a fire escape, check local codes and building rules first. Some places allow plants; others don’t. Safety trumps vibes.
Placement tips:
- Keep at least one foot of clear walking space.
- Use rubber pads or composite shims to level and protect surfaces.
- If wind howls through your alley, position the planter against a wall and avoid top-heavy plants.
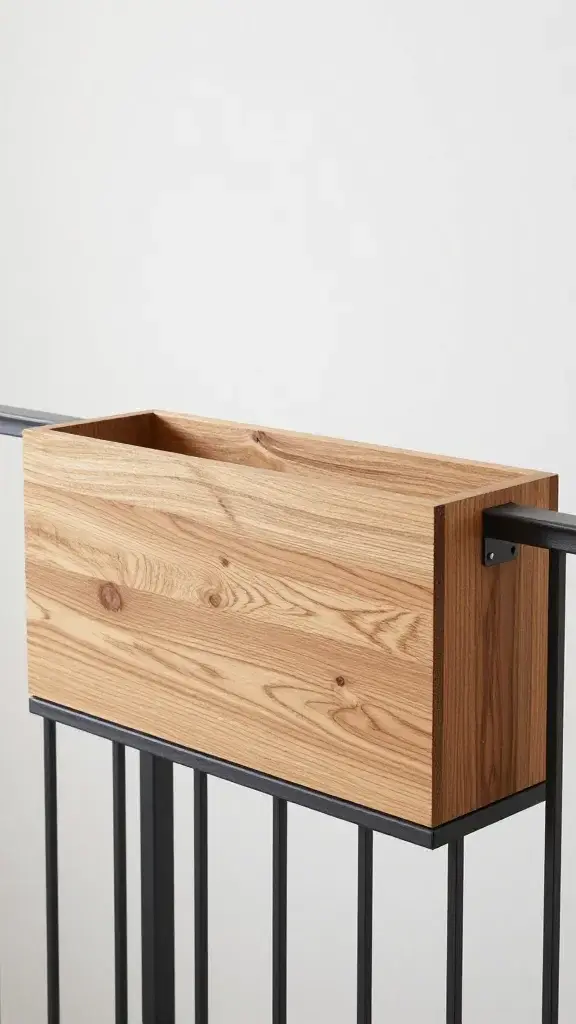
Railing Mounts (If They’re Allowed)
You can mount smaller boxes with adjustable brackets, but only if your railing can handle it. Use metal brackets rated for outdoor loads. Don’t trust zip ties unless you enjoy chaos.
Style Upgrades That Don’t Try Too Hard
You built a clean, modern box—now season it to taste. Keep it simple so the plants star as the main characters.
- Stain or oil: Natural tones look classy. Black stain goes ultra-modern and hides dirt.
- Contrast soil line: Add white or black river pebbles on top for a clean finish and moisture retention.
- Label markers: Minimalist aluminum or slate markers = chef’s kiss.
- Modular approach: Build two narrow boxes instead of one big one. They’re lighter and more flexible.
Maintenance: The Chill Routine
You don’t need a spreadsheet. Just a quick loop each week:
- Water, then check leaves for pests (aphids love drama).
- Snip herbs often—harvesting encourages growth.
- Pull yellowing leaves so the plant focuses on new growth.
- Every 3–4 weeks, feed with a diluted organic fertilizer.
- End of season: compost spent plants, refresh the top few inches of soil, reseed cool-weather crops.
FAQ
Do I need a liner, or can I skip it?
You can skip it, but a liner helps your planter last longer by reducing moisture contact with the wood. It also keeps fine soil particles from leaking out of gaps. For a breathable option, use landscape fabric, not plastic.
How can I make the planter lighter?
Use a high-quality potting mix with perlite or pumice and avoid dense compost. You can also create a false bottom by raising the internal floor with 1×2 cleats if your plants have shallow roots. Just keep at least 6–8 inches of soil depth for most herbs and greens.
Will the wood rot even if I use cedar?
Eventually, yes—wood and water never become best friends. Cedar resists rot well, and sealing the exterior extends its life. Good drainage and airflow matter more than any miracle product.
What’s the easiest irrigation setup?
A small drip kit on a battery timer works beautifully, even for one planter. If that’s overkill, use a watering can but add a moisture meter so you don’t guess. FYI, overwatering causes more problems than underwatering.
Can I grow tomatoes in a 10-inch-deep box?
Yes, but choose compact or patio varieties and add a small trellis or stake. Feed them regularly, and don’t crowd them—one plant per 12–14 inches of length works best. Cherry tomatoes give you the most reward in small spaces.
Do I need to elevate the planter off the deck?
A little lift helps a lot. Even rubber feet or composite shims keep the bottom dry and prevent water stains. Elevation also keeps critters and stray puddles from turning your planter into a swamp.
Wrap-Up: Your Balcony’s New Favorite Thing
You now have a clean, modern planter that fits tight spaces and makes you look like someone who has their life together. It drains well, resists rot, and shows off your plants without shouting. Build one, plant it up, and watch your balcony or fire escape turn into the tiny garden you swore you didn’t have room for. Honestly? That first basil harvest will make you a believer.